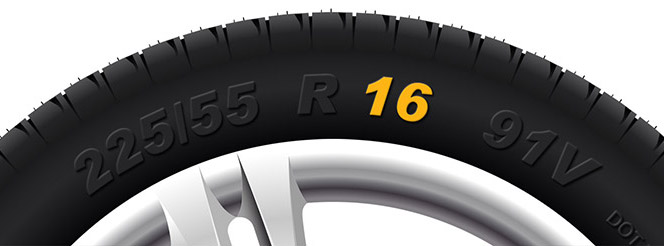
Flat Tyres
What to do if you experience a tyre puncture while out and about on the roads.

Being made of rubber, tyres are susceptible to damage caused by objects on roads. Sharp objects like screws and nails can easily pierce the tyre tread if driven over, but even blunt items like rocks, potholes, and metallic objects can cause a tyre split or become embedded in the tread.
Here’s what to do if you get a puncture.
Can you drive with a flat tyre?
If you experience a flat tyre while out and about on the roads, you should not continue to drive the vehicle – as this could damage your wheels and necessitate costly repairs. Instead, stop in a safe location as soon as possible.
Even if you have a slow puncture, you should stop to change your tyres as soon as possible. Driving with a slow puncture increases the risk of a blowout. Driving with a set of tyres in good working condition is crucial for your safety, your passengers’ safety, and that of other road users.
Although driving on a flat tyre to get to a place of safety in order to review the damage is acceptable, travelling a longer distance with a known fault is considered dangerous and reckless. This action can carry a penalty, including a fine and points on your driving licence.
How far can you drive with a flat tyre?
The maximum distance you may drive safely on a flat tyre is 50 miles. However, driving with a flat tyre is not encouraged because it is unsafe for both you and your vehicle.
What happens if I drive on a flat tyre?
Driving on a flat tyre can result in internal tyre structural damage, wheel and vehicle damage, poor vehicle handling and control, and accidents. It can also harm the structure of your tyres by concentrating extra weight on the rim edges, which can bend, distort, or become permanently ruined. If you continue to drive on a flat tyre, your vehicle will pull severely to one side, making straight driving difficult.
How long does tyre foam last?
When you suffer a puncture, tyre foam can be used to temporarily fix the problem. However, regardless of the type of sealant you fill your tyre with, it’s important to remember that it’s only a short-term repair as the tyre hasn’t been removed from its wheel and examined for internal damage.
Typically, tyre foam or sealant will last between 50 - 100 miles before it starts to become ineffective. It’s essential that you get your tyre fixed or replaced properly as soon as possible – ideally, on the same day. After discovering a puncture and making the temporary repair, you should head directly to a tyre fitter or garage.
How to use a tyre inflation kit
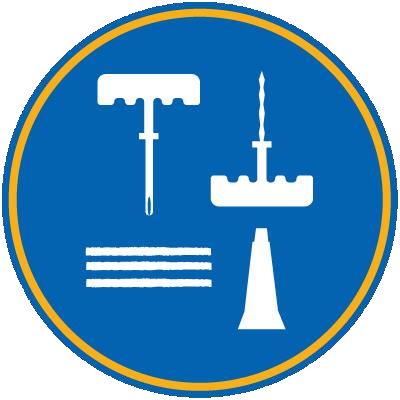
If your puncture is in the middle of your tyre, not near the sidewall, you can use a puncture repair kit to fill the hole.
Puncture repair kits are simple to use, but require some additional tools.
If you’re unsure of DIY repair work, be safe and call a technician to complete it properly – it’s better to wait a while than to have an accident.
You’ll need a jack to lift your car safely off the floor, and a sharp knife or cutters. Once you have access to the tyre, locate the puncture and use the reamer tool (the one that has the texture of a file) to clean the puncture hole. This process is similar to cork-screwing, except you need to push the reamer tool into and out of the puncture a few times to make sure the hole’s even.
Then put the sealant (in the superglue-like tube) onto one of the rubber strips and thread that strip through the second tool – the one that looks like a giant needle-eye.
Make sure the strip is centred in the tool.
Push the end with the rubber strip through the puncture, wait a moment, and then – as quickly as possible – pull the tool upwards.
This should leave the rubber strip stuck in the hole. All you need to do now is trim the excess.
Remember though that this repair is still just a repair. For your safety you should book a tyre replacement as soon as possible.
How to use a tyre inflation kit
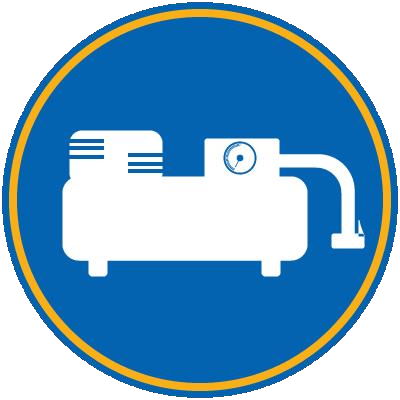
These days, tyre inflation kits are often included in vehicles by car manufacturers instead of the traditional spare wheel. Invaluable when you find yourself at the mercy of an unexpected puncture, this piece of kit has everything you need to get back on the road so you can get your car to a safe location and assessed by a professional.
If you experience a puncture, the first step is to find yourself somewhere safe to park. Once parked, put your hazard lights on and, if you have one available, pull on a high-vis jacket. Avoid narrow lanes or blind, sharp corners. A warning triangle can also be helpful to position further from your vehicle in order to warn oncoming traffic.
The good news is that tyre repair kits aren’t difficult to use. However, if you don’t feel confident carrying out the task, always call for assistance rather than put your life at risk.
If you decide to use the tyre repair kit, you’ll need to make sure your car is ready first. To prepare your car for this temporary repair, apply your handbrake and ensure all passengers exit the vehicle. Next, remove the kit from your boot and grab the compressor and sealant.
The next step is to locate your puncture, so thoroughly examine the affected tyre. There are circumstances in which the damage will not be so easily repaired by your kit and you will need to call for a tyre change. These can include the wheel itself being damaged, a tear in the sidewall of the affected tyre, or if there is a hole larger than 4mm in the tyre tread. In such situations, replace your damaged tyre with a spare tyre if you’re carrying one.
Connecting your repair kit is the next order of business. The majority of kits will require you to squeeze the entire container of sealant into the damaged tyre by hand through its adapter. To do this, you might be required to remove a tyre valve, but this will be indicated in the instructions included in either your vehicle handbook or the repair kit itself.
When the entirety of the sealant has been squeezed into the tyre, you can attach the kit’s compressor into either a 12-volt socket or cigarette lighter located inside your vehicle. To make certain the sealant makes its way through the whole tyre, it’s a good idea to roll your car forward a little.
Some repair kits may benefit from an extra adapter which will enable you to attach the sealant bottle to the compressor. Instead of manually adding the sealant, you can pump it in with assistance from the compressor.
Now you’re ready to inflate your tyre. After making sure your vehicle is in neutral, start up your engine and turn on the compressor. Inflate your tyre to the correct pressure recommended for your car, making sure you don’t over inflate it. You can usually find the ideal pressure for your make and model on a sticker on the inside of your driver-side door, and it should also be listed in your vehicle handbook.
With your tyre properly inflated, make your way to the closest garage. Though be aware that you shouldn’t drive as fast with a temporarily-inflated tyre – check your driver’s manual as well as the recommendations for the particular inflation kit you’ve used.
Can you drive with a screw in your tyre?
On examining your puncture, you may find the item that caused it still embedded in your tyre. A screw is one of the most common suspects.
Your first impulse may be to remove it, thinking you can’t drive with it in place, but in fact your best course of action is to leave it right where it is. Contrary to popular belief, removing a screw, piece of glass or nail may actually enlarge your puncture and make it worse. If the screw is pushed into the tyre far enough, it may also be stopping it losing air.
While driving a short distance to somewhere you can get your tyre fixed properly or replaced entirely is within reason, continuing to drive longer distances with a screw on board is not advised. A screw left in place can potentially become a blowout, leading to loss of vehicle control and a potential collision with other motorists.
Getting the screw removed as soon as possible can also be cost effective. If you catch it early, it may be a simple and inexpensive procedure to fix your puncture. If left, however, it could lead to you forking out for a whole new tyre – or, worse, a new wheel.
Check availability at your local Kwik Fit
For service you can rely on, get in touch with your local Kwik Fit centre for your tyre repairs and replacements.